Product
Sage 100 Cloud 2020 or greater
Paya Connect
Paya Connect Developer/Demo Account
Description
The steps below allow resellers and Merchants to switch between demo and live modes of the Sage 100 Cloud e-Invoicing solution for testing/demo purposes. This requires the Merchant to have a Demo Account from our Developer Portal for Paya Connect; Partners and Merchants can register for this solution here.
Resolution
- Open the C drive on the machine where Sage 100 Cloud is installed
- Open the Sage folder
- Open the Sage 100 (Standard/Premium) folder
- Open the MAS90 folder
- Open the Home folder
- Open the Microsoft.net folder
- Open the Sage.Paya folder
- Run the Sage.Paya.Configuration.exe
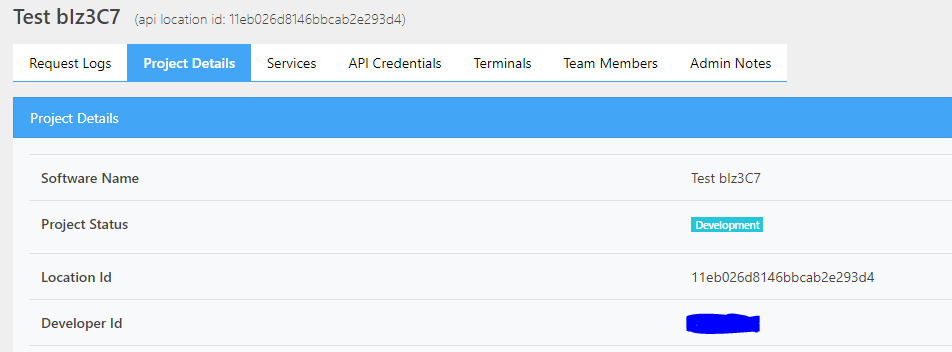
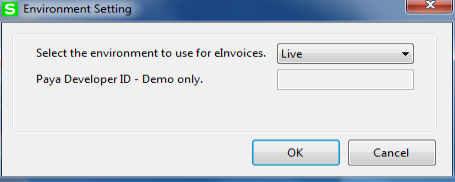
- Select Demo and enter your Paya Connect Developer ID, this ID will be found in your Developer Portal under the Project Info Tab.
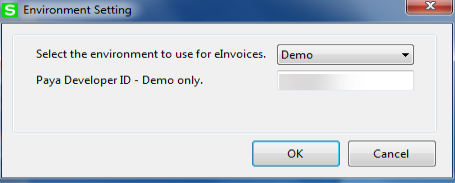
- Note: If this is already in Demo Mode, switching to Live Mode will not require a Developer ID as that is a hardcoded value in the Live environment.
If you have questions or require additional information, please contact us and we will be in touch with you shortly.
